
Pro Guide to Architectural Photography
- Mar 10, 2021
- 19 min read
Updated: Feb 21, 2022
Architect and Photographer, Chris Humphreys, guides you through a professional shoot and the challenges facing an architectural photographer. www.chrishumphreys.net

If you want to understand what constitutes good architectural photography and learn how to approach a professional architecture shoot, then this comprehensive guide is for you. As a professional architecture photographer since 2009, I've undertaken hundreds of commercial shoots and written countless articles for photography magazines. So what you read here are first hand architecture photography tips from a working pro. Whether you're a beginner wanting to learn more about this genre, or a more experienced photographer looking to dip your toe into the world of commercial shooting then you're in the right place. But first a bit of background.
What is architectural photography?
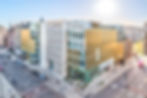
We live in houses, shop in retail parks, learn in universities, work in offices and eat in restaurants. Our lives are influenced by architecture every day without us realising it. So it is no wonder that our fascination with man-made structures translates into architecture photography being a hugely popular genre.
Commercial architecture photography has been ongoing since the 1860’s, but it was only with the introduction of half tone printing in the 1890's that photography became the chosen medium to portray architecture. Major publications were able to print photographs, illustrations and text side by side for the first time and architects relied on photographs as the main way of publicising their work. In an era of ultra realistic 3D visualisations and stunning graphics, I believe architecture photography still stands as the single best way of representing architecture in an artistic way.
Architectural photography has evolved over time. In the early days images were of clean and clear spaces, free of clutter and people. The spaces within the building, and the building itself were the main focus of the photo, perhaps with a few select pieces of architectural furniture. The photography was to sell an idea of utopia, a statement of what the architect was capable of. Landscaping was simple and pristine, often with hard landscaping being designed as an extension of the building. Photography allowed that architectural ideology to be recorded in a way that no other medium could.

Today architect’s thinking has moved on, buildings are more about functionality combined with joy and a sense of place, the way people interact with buildings is fundamental. This is not just a case of including people in the photograph, it is about how the building and spaces inside look and function in use. In the case of homes, it is about how the architecture allows people to personalise a space and take possession. Architectural photographs must now take this into account with buildings often only be photographed once furnished and occupied.
Of course architectural photography isn’t just for new buildings or even buildings alone. The genre encompasses all man made structures, from bridges to bus shelters. But for me, my bread and butter is new build work. As an architect, I understand that designers will agonise over natural light, artificial lighting, orientation, materials, connecting spaces, integration into the surroundings, mood setting, style, reflections and all manner of things. The job of architectural photographers is to capture all of this, to see into the designer’s mind and present photos which reflect the original design intent.
The architectural shoot needs to tell a story, the images need to show how the building has been integrated into its setting whether it is urban or rural, or perhaps illustrate how it has been designed to stand out and detach itself from the surroundings. The images need to illustrate detail, material choices, structure and composition within the building elements.

Strong architectural structures make for dynamic images
All of this has to be carefully timed to make the best use of light, or sometimes lack of it. Photographing architecture requires rigorous planning and efficient execution. In a competitive commercial environment, time is limited and unpredictable weather makes it all the more important to be prepared.
The artistic aspect of architecture shots is something that comes naturally to some people, particularly if you come from a design background. The technical aspect of taking photographs is something that can be learnt over time, but if you want to be successful it needs to become instinctive. At some stage though, it’s time to tackle that first assignment.
PLANNING THE SHOOT:
The vast majority of enquiries I receive are in the form of a very short email, along the lines of "We've recently completed a building in Glasgow and need some photography, what's your availability?". Not much to go on, so we'll need some more information before we can quote and plan the shoot.

Request a brief and site information
I tend to ask for a location plan, site plan and building plans together with any snaps the architect / designer / developer has taken of the building. The size of the building, location, the number of shots required and / or the time availability will dictate your fee quote. The location plan and site layout will give you the orientation of the building so you can work out where the sun will be at different times of the day, the floor plans show the internal layout and the snaps fill in the blanks. Once you have this you can respond noting your fee, timescales and include a copy of your Terms & Conditions (this is important as it will contain your licensing / copyright terms). I've included a small summary on what architectural photographers can expect to make at the end of this blog.

Look for site constraints
Once you receive confirmation from your client to go ahead, you need to plan the shoot. The orientation of the building will have a bearing on how you approach the shoot. As a general rule of thumb start outside with context shots and work in to detailed shots and then move inside. If the weather conditions are looking good in the morning but not so good in the afternoon, at least you’ll have your external shots complete in good light, sun isn’t so critical for the internal shots. You’ll need to make sure you arrive at the right time to catch the sun on the first elevation worth shooting. Don’t forget that in the height of summer you can catch the sun on a north-east facing elevation if you get up early enough! I use an app called Sun Position which allows me to see exactly where the sun will be at different times of the day throughout the year, and also when the sun will rise / set.
Do a recce if possible
If possible it is a good idea to visit the building before the shoot to get a feel for which shots are a must and how long it might take to cover the various angles. Visiting the building will also give you the chance to have a look at any neighbouring buildings which might overshadow certain shots. If you can’t visit the building, try Google maps - street view.
Above all else, be flexible! It's all well and good planning a shoot, but if the sun is hiding behind clouds and only popping out occasionally, then you may need to change your plan and move things around a bit. Don't forget the golden rule... IF YOU SEE A GOOD SHOT THEN TAKE IT! Don't wait until later to grab it, as the light will have changed and it will no longer be the shot you wanted. You may also want to capture the same photograph at different times of day.
ON ARRIVAL:

Assuming you’ve been given the chance to prepare and have a game plan, aim to arrive 20 minutes early to give you time to quickly walk the building. You’ll want to check for unexpected obstacles such as delivery vehicles which might affect your timing. Have a think about the right equipment to carry around with you and what you can leave in the car for later.
Finally, if the building is occupied go and say hello to the owner, tenant or security guard. This particularly applies if shooting in a security sensitive location like a shopping centre, and saves time on being challenged later.
CONTEXT VIEWS:
It’s a good idea to capture the context views first and work your way in close to the building. These are the shots that show how the building relates its surroundings, be it an urban or rural setting. If you think of the building as having a face, which way is it pointing? Try to include a reasonable amount of foreground in front of the main face and place the building off centre for a stronger composition.

Lenses can be varied but a medium focal length of around 50mm on a full frame camera or 35mm on a DX camera works well. This will allow you to work from a distance and for-shorten the perspective slightly, sitting the building more comfortably in its context. This focal length is also close to that of the human eye, so the images retain a natural appearance. If you don't have a 50mm prime lens then set your zoom lens accordingly.
Sometimes you simply can’t get far enough away from the building so a wide angle lens is the only option, just be aware that this will make any neighbouring buildings or greenery beyond the subject appear to be even further in the distance. Experiment with different angles and use leading lines to draw the viewers eye to the focus of the photo.

Using a longer focal length and compressing perspective works well for context shots
For most of the general shots you will want good front to back sharpness so put the camera on a tripod and select a narrow aperture of F11 – F14. A tripod is essential for architectural photos as most shots will require a long exposure, I currently use a Manfrotto 190 XProB tripod with a Manfrotto Xpro geared head, and I find that it is worth spending the time properly setting up and levelling the camera to save on time in processing later. The geared head allows for very precise adjustment. High quality kit may cost a little more but will stand you in good stead, I've had my tripod for over 10 years.
If you are trying to shoot a building from across a busy road try using an 8 or 10 stop neutral density filter to increase the shutter speed to 20 seconds or more, this will result in traffic free photos as the passing cars won’t register on the sensor.
GENERAL BUILDING VIEWS:
For your general shots you will be moving closer to the building but still include some of the neighbouring context. The purpose of these photographs is to show the principle elevations off to their best and capture the overall composition. There is no set formula for which angles to use, suffice to say that variety is a good thing, some angles may not look great in camera but work well when viewed later in editing.

In general because you are closer to the property you will want to use a wider angled lens. Something in the range of 14mm to 24mm for full format cameras, or 10mm to 20mm for DX format. Wide angled lenses can make even the simplest property look dynamic, and in confined urban environments can allow for very close proximity shooting. However, they are not without their problems, some lenses will display distortion, so care needs to be taken when choosing your angle.
Close proximity shooting and tall buildings will also result in converging verticals or perspective distortion. Simply put, this is the appearance of the vertical edges of a property appearing to disappear up into the distance. The human eye is very good at telling the brain that verticals are straight up, so in reality we don’t read these converging lines (unless you are standing a the base of a tower block). There are a couple of techniques to correct verticals; one is to use software such as PT Lens or the lens correction filter in Photoshop. But the preferred method of the pros is to use a perspective control or tilt shift lens.

Shoot with your tripod levelled and use a tilt shift lens if possible, if not then shoot wider and angle the camera up, then correct verticals in editing
If you are using a standard lens and planning to correct in post processing then include slightly more context in the image than you will eventually want, as a corrected image will need to be cropped meaning lost pixels. One other way around this is to shoot in portrait format and level the camera, this will result in straight verticals but a lot of foreground. The foreground can be cropped in post processing giving a square format photograph.
DETAILED BUILDING VIEWS:
Look for compositions within the façade, elements of structure or particular features that define the building’s character. We’re not talking about detailed studies of materials here, those shots come next.
The entrance is always a good place to start, architects will often try and design a property to create a distinctive entrance. There will often be some form of covered canopy, walkway or feature lighting which can be used to frame an outside space.

Detailed photography, particularly around entrances, are a good opportunity to use a neutral density filter to slow the shutter speed and motion blur any passing people. A 6 stop ND filter used in bright daylight will give a shutter speed of 0.5 – 1 second, ideal for producing just the right amount of blur without losing the people altogether.
Lens choice is fairly flexible for this type of shot, wide angle lenses will produce dynamic images but potentially with some distortion at the edges, a telephoto lens will allow you to step back and see the compositions within the property more easily from a distance.
BUILDING DETAILS:
Architects, construction companies and suppliers will always be keen to see close up shots of how successfully they have put the building together and married various materials. Zoom lenses with a longer focal length of between 70 - 100mm will work well for full frame sensors, or 50 - 80mm for cropped sensors. The aim is to illustrate a pleasing composition of a number of different elements.

Including some glazing can give pleasing reflections and work well with these types of architecture images. Square on views giving a ‘materials sample palette’ photo also work nicely. Experiment with a wider aperture to give a shallow depth of field and isolate a certain detail within a composition.
If you see something that catches your eye while you are walking around taking the wider shots, capture it there and then as the light will have changed by the time you go back and it may not look as attractive. Remember that the purpose of these detailed shots is to compliment the whole set of photographs and tell part of the story.
INTERIOR PHOTOGRAPHY:
Interior photography is an entire subject in its own right, as there are many nuances that make or break an interior shoot. As a rule of thumb, the strategy for interior photography should mirror that of the exterior shoot, start with wider general shots of each space and work in to more detailed shots. Pay attention to where the window light is coming from, if the sun suddenly appears from behind a cloud lighting up part of an interior that you aren’t shooting, be prepared to stop what you are doing and grab the shot while you can.

Natural light only was used for this interior photo, with some fill flash within the kitchen area
One of the key factors to consider when shooting an interior is how to light the scene, in the past it wasn’t uncommon for architectural photographers to spend hours carefully setting up additional lights to produce even lighting for a scene. Today digital cameras allow us much more flexibility, the main advantage is the ability to check the histogram for correct exposure at the time of capture. I would say that the majority of interiors that I shoot are photographed under available lighting conditions. I will only use infill flash using a Nikon Speedlight SB900/910 when it is needed. Designers take great care to create the desired mood in an interior, the last thing I would want to do is flatten the lighting scheme and make the images look like they have been artificially lit. When using infill flash I will place the flash unit off camera and bounce diffused light carefully off a wall or ceiling to fill in shadow areas.

One of the many challenges facing the architectural photographer shooting internal scenes is balancing artificial and natural lighting. Understanding the different types of artificial light and how they affect the colour cast of a scene is crucial. There may be a green cast from fluorescent or an orange cast from tungsten. One of the most challenging artificial lighting situations to shoot under are full spectrum daylight fluorescent lights, under average white balance shooting the images almost come out black and white, this is something to bear in mind in post production, where you may need to increase saturation slightly to compensate.
Including a window view on interior photos
Sometimes the view through a window is part of the magic of an interior space, but the chances are that several stops of difference in light between the interior and the exterior will make capturing the photo in a single exposure and retaining the view impossible. One option would be to take several exposures and use exposure blending or HDR in Lightroom. The trouble is this is time consuming and doesn’t always guarantee that the view through the window will be as expected.

This image is a composite of two exposures to retain the garden view
The more controlled method is to take one exposure metered for the interior scene and one metered for the view through the window but around 1 stop over exposed. The reason for over exposing the second shot is because we perceive the view to be brighter when seen from inside due to the high contrast ratio. The second shot will need to be taken with a flash to light up the inside of the window frame to make blending easier later.
Paste the second exposure on top of the interior space exposure in Photoshop and add a layer mask. Simply paint in the view taking care to blend in the edges around the window. Use the opacity slider on the pasted layer to make sure you have a natural look whilst still maintaining the view.
For more detailed tips on how to capture great interior photos, take a look at my blog on the subject.
Photoshoot summary
So that’s it, you’ve completed your shoot and may have around 100 photos to review, process, stitch, blend and whittle down to a complete set of around 40-50. One thing to remember when post processing is to keep your white balancing of the images consistent, it is a good idea to view the set as a whole at various stages to make sure you achieve a unified appearance. Using the thumbnail preview mode in Adobe Bridge is useful for this.
You don’t need a big budget to get started shooting the built environment, but there are subtleties that separate the average shot from a great architectural photograph. It is worth starting out with a wide angle lens and a sturdy tripod, expensive kit such as tilt shift lenses help if you shoot a lot of architecture, but they aren’t critical to making a start.
The skill sets learnt in other genres of photography can translate well into architectural photography. Composition, lighting, mood, control of focus are all common techniques. Combine this with our instinctive harmony with the built environment, and with a sympathetic approach architectural photography can prove to be a very rewarding genre.
What are tilt shift Lenses?
The shift lens has been the favoured choice of the professional architectural photographer since the switch to digital. Previously the pros would use view cameras which would allow the lens and film plates to be moved independently. This movement would allow easy correction of vertical perspective, giving the characteristic appearance of the architectural photograph.

Nikon’s first shift lens was the Nikkor 35mm PC F/3.5 introduced in 1962 (pictured). The ‘PC’ stands for perspective correction. Quite simply if you point your camera upwards at a property, the verticals converge. To stop this from happening you must keep the camera level, with a standard lens this usually means missing off the top part of the property and including a lot of foreground.

The shift lens has a much wider image circle than a standard lens meaning when the lens is physically shifted upward the camera can remain level and the top half of the property will be included in the photo. The other significant advantage is the ability to shift the lens sideways, take a shot then rotate the lens through 180 degrees and take another shot, giving a perfect panorama with next to no parallax issues.

24mm PC-E lens used with horizontal shift to create a panoramic crop
Dusk architecture photography
Buildings lend themselves perfectly to night shots, reflective glazing during the day gives way to transparency as the interior lighting takes over as the main source of light. Public buildings and transport interchanges with plenty of glazing make great subjects and will often have the added bonus of attracting plenty of people to create some interesting motion blur.

Use Adobe Lightroom to boost saturation and contrast to really make dusk images pop
The best time to shoot is in the early morning or evening when the ambient external light is low but not completely dark. A little natural light is needed to subtly illuminate the exterior of the property and must be balanced with the intensity of the interior artificial lights.
The same goes for night shots inside a property looking through a window, falling external light will make balancing the interior and exterior light much more simple.
Architectural photography gear guide
Camera body - Nikon D850

price: £2699 (body only)
Nikon’s mega resolution professional FX camera. Many architectural photographers favour large format cameras with digital backs due to the superb image quality and high resolution. The D850 provides a (relatively) cost effective alternative, with a huge dynamic range and an awesome 45.4 mega pixel sensor.
Tripod Head - Manfrotto 405 geared head

price: £594
A geared head is a must for any architectural photographer, cameras will most often need to be levelled particularly when used with a tilt and shift lens. The precision controls on the Manfrotto 405 head combined with its quick release feature make it ideal for quick set up times. A more cost effective alternative is the Manfrotto XPRO geared head which is lighter (and therefore a little less sturdy), but comes in at £215.
Camera Lenses:
Nikon 24mm f/3.5 PC-E lens

price: £1899
www.europe-nikon.com
Nikon’s outstanding wide angled tilt and shift lens is the favoured lens of many an architectural photographer. The shift mechanism allows verticals to be corrected with ease and the rotating bezel allows flawless stitched panoramas to be taken. The added bonus is the tilt mechanism which can give you incredible perceived depth of field. Barrel distortion is minimal and images are pin sharp.
Nikon 14-24mm f/2.8G ED lens

price: £1509
When you are backed into a corner trying to make the smallest of interior spaces feel bigger only a wide lens will do. On an FX sensor the 14-24mm Nikon lens is about as wide as you will need. It delivers exceptional sharpness and coverage. This lens was the first of its kind when it launched, and it’s still out front today.
White balance finder - Datacolor SPYDERCube

price: from £20
Many architectural interiors have mixed lighting conditions and a range of colours on the walls and floors, this makes for difficult white balancing. SPYDERCube can be included in a shot and allows easy white balance correction in a RAW editor during post processing. The handy little pocket sized cube has grey, white, black and highlight elements to allow you to tweak, exposure, black level and brightness with ease in post production.
9 Pro Tips: what makes a good architecture photo?
1. Look for strong geometry

Santiago Calatrava is renowned for his stunning architecture which often express the structure of the building. The purpose of this shot was to emphasize the rhythm created by a repeating structure and although open to one side, it gives the impression of an enclosed space. The shot was converted to black & white with channel mixer on Photoshop, to allow the focus of the image to be the structure itself.
2. Use reflections in photographs

When shooting next to water, look for the opportunity to include reflections of the structures you're photographing.With this type of composition it's usual to centre the horizon and include the full reflection, creating symmetry and a more powerful image. This image also uses the handrail at the side of the river to draw the viewers eye into the photograph.
3. Shoot in the evening
Evening is a great time to photograph architecture, the magic moment is when the daylight fades between sunset and end of twilight and balances the interior lights. It is a narrow time slot so it pays to be set up in time and take test shots to make sure you have the best angle and composition. Natural blue hues in the sky compliment warm interior colours nicely and make for a please and bold image.

4. Include context

This house faces due south and stands proudly looking onto a wildflower meadow. The retaining walls have been used as lead in lines and the flowers give a nice foreground to the image. A low shooting angle emphasizes the prominence of the house overlooking the surrounding countryside and separates it from the distracting neighbouring buildings.
5. Use other structures to frame your building

This goes hand in hand with including context, but with urban environments, you can include neighbouring structures to frame the subject of your shot. In this image I used the tall contemporary glazed buildings each side to frame the period residential property (a converted former hospital ward block). The result is a pleasing contrast between new and (sort of) old.
6. Shoot from a raised viewpoint
Use the opportunity where possible to get up high and shoot from a raised angle. This gives a totally different perspective on composition. People and cars give the photograph scale but in a totally different way than they do when shooting from eye level.
7. Look for an interesting materials palette

Look out for junctions between different materials and try to create a materials sample palette shot. These often work best when square on to the plane of the wall under diffuse light. This shot has the added interest of a glass balustrade and therefore reflections. Architects love this type of shot as it shows off how carefully they’ve detailed the material junctions.
8. Be wary of white balance issues
When shooting interiors it is critical to achieve the correct white balance, in this case a neutral grey cube was placed in the scene and removed in post processing. The grey cube was then used as a base setting for white balance in Lightroom. However the fun doesn't stop there, lights were on in this shot, so the warm tungsten lights needed to be toned down to balance the natural light in the scene.

9. Shoot square on

One point perspectives work very well in rectilinear spaces, the effect is emphasized in this shot by the columns and layering of different elements. Subtleties like the inclusion of the dog (he refused to move) and the open patio door give the impression of a lazy summer day. The view through the window was pulled back in post processing but left slightly over exposed to accurately reflect the scene as it was.
How much do architecture photographers make?
This is a question I'm often asked along with "what's your day rate?"
I don't tend to quote day rates as my shoots are mainly based around a set brief rather than the amount of time I spend on site. In addition to this, the portion of time spent on site against post-processing time is around as 30/70 split (this varies a little depending on the job). Take real estate photography for instance, if all goes well and the show homes are ready, then I can potentially photograph 3 x 4 bedroom properties in a day. This would generate around 150 final images to process which might take me 2-3 working days.
So this is why it's so important to pin down a brief at the outset, one which the client buys into so they know what to expect and they also know they're paying a fixed price for. It's also important to issue a set of your terms and conditions with the quote, as this includes information on licensing and copyright.
So how much do architectural photographers make on a single days shoot? Anywhere between £250-£2500. Quite a range! Why such a range in costs? Well it depends on so many things, for example:
is it a commercial or private client?
what image usage do they require?
where is the project, is it local or difficult to get to?
how valuable is the project to you? (see below)
can you potentially resell more image licenses after the shoot?
is the project going to be good for your social media presence?
how straight forward is the shoot going to be?
is there a lot of set up time involved?
will there be challenging lighting conditions resulting in more post processing?
are you likely to get repeat work from the client?
is more than one party interested in sharing the costs?
what are your ongoing business costs?
how is your business set up? limited company? sole trader?
how busy are you? Do you need the work?
So as you can see there are a number of variables, and how much you make from each shoot will depend more on your own personal business profile / circumstances / experience than quoting a standard fee per shoot.
So that's about it for this blog. I'll be looking at more specific aspects of this in future articles. Hit the subscribe button to keep up to date. Thanks for reading!